Built Tough.
Agrocrete® Hollow Block.
Engineered for strength, thermal comfort, and carbon-negative performance. The Agrocrete® Solid Block is a next-generation building solution for walls that last and protect the planet.
Engineered for strength, thermal comfort, and carbon-negative performance. The Agrocrete® Solid Block is a next-generation building solution for walls that last and protect the planet.


Built for a Wide
Range of Applications.
Ideal for load-bearing and non-load-bearing walls in residential, commercial, and industrial projects. Suitable for both interior and exterior applications, offering unmatched insulation, durability, and environmental benefits.
Load-bearing Certified up to X kgs (per block).
Better Thermal Insulation than RCC infill.
Recommended for G+3 buildings and below.
Attribute
Dimensions
Compressive Strength
Thermal Conductivity
Density
Water Absorption
Carbon Footprint
Agrocrete® Solid Block
300mm x 200mm x 100mm
>10 MPa
0.26 W/mK
~1250 kg/m³
<15%
3CO₂
Attribute
Agrocrete® Solid Block
Dimensions
Compressive Strength
Thermal Conductivity
Density
Water Absorption
Carbon Footprint
Material Composition
300mm x 200mm x 100mm
>10 MPa
0.26 W/mK
~1250 kg/m³
<15%
3CO₂
Agrocrete® blend of crop residues and industrial byproducts, free from mined topsoil or high-clinker cement.
Agrocrete® blend of crop residues and industrial byproducts, free from mined topsoil or high-clinker cement.
Simple, Fast, and Familiar.
Installation Guide
Agrocrete® solid blocks are built for strength, stability, and speed. With compressive strengths of up to 20 MPa, they’re perfect for loadbearing walls, foundations, and critical structures, all while being carbon-negative.


step - 01
Easy Handling & Storage
Store safely on level ground, covered and protected — no special conditions required.
Tip
Tip
Tip
Dense, robust blocks that are still simple to handle and stack.
step - 02
Simple Site Preparation
Clean and level your base surface for a strong start.
Mark lines accurately and check diagonals for perfect alignment.
Roughen RCC contact areas for excellent bonding.


step - 03
Quick Block Laying
Works with any standard masonry mortar.
For the best performance and lowest carbon footprint, we recommend a BINDR™-based low-carbon mortar.
First course laid in rich mortar (1:3) for a stable foundation.
Subsequent courses in 1:4 to 1:6 mortar or thin-joint adhesives.
Maintain tight, clean joints (10-12 mm for mortar; 3–5 mm for adhesives).
Tip
Tip
Tip
Larger block sizes allow for up to 30% reduction in mortar consumption, lowering costs while making it easy to build.
step - 04
Structural Performance Built In
Ideal for walls and foundations — no cavities or reinforcement needed.
Use RCC lintels or bands at sill and lintel levels over openings for load distribution.
For enhanced structural systems, tie-columns or RCC bands can be added if required by the engineer.
Tip
Tip
Tip
Larger block sizes allow for up to 30% reduction in mortar consumption, lowering costs while making it easy to build.


step - 05
Installing Service Lines
Chiselling: Service lines (electrical conduits, plumbing sleeves, junction boxes) can be installed by chiselling neat grooves into the block surface.
Placement: Lay conduits or pipes securely in the grooves as per MEP drawings.
Fixing: Apply a rich plaster mortar (1:3) over conduits and junction boxes to lock them in place.
Finishing: Smooth over with plaster for a clean, flush finish.
Tip
Tip
Tip
Agrocrete®’s dense yet workable matrix makes chiselling and embedding services easy, while maintaining wall strength and integrity.
step - 06
Smooth Finishing
Compatible with cement-sand plaster, gypsum plaster, BINDR plaster or waterproof coatings.
Exposed walls? Coat with a hydrophobic sealant for an aesthetic finish.
For external walls, just apply a standard plaster, and for Internal walls, gypsum plaster provides a sleek, fast finish.
Tip
Tip
Tip
Agrocrete®’s unique micro-textured surface gives excellent plaster adhesion.


step - 07
Easy Curing
Normal curing practices apply — keep mortar joints damp for 7 days.
Full curing continues for 28 days, just like conventional masonry
Tip
Tip
Tip
When paired with BINDR-based mortars, the curing time reduces to 1 day.
step - 08
Sustainability Advantage
Every Agrocrete® solid block is carbon-negative and thermally efficient.
Paired with BINDR™ low-carbon mortar, your project achieves unmatched sustainability credentials without compromising performance


From Innovation to Impact:
How Agrocrete® is Made
Discover the science and precision engineering that turn sustainable materials into a carbon-negative, high-performance building block for the future.
Carbon-Negative
Each block locks away more carbon than it emits in production.
High Insulation
Keeps interiors cooler in summer and warmer in winter.
Cost-Efficient
Cuts long-term energy use and reduces maintenance costs.
Superior Strength
Meets and exceeds structural safety requirements.
Carbon-Negative
Each block captures more carbon than it releases.
High Insulation
Keeps interiors cooler in summer and warmer in winter.
Cost-Efficient
Cuts energy use and reduces maintenance costs.
Superior Strength
Meets and exceeds structural safety requirements.
Imapct Calculator
See the difference Agrocrete®
can make on your Project’s Footprint.
350% Higher Thermal Insulation
50% Lower Construction Cost
100% Faster
Masonry
Select the area (in sq.ft)
1000
1500
3000
9000
12,000
20,000
36,000
50,000
CO₂ saved.
5,500 kgs
In 1000 sq.ft compared to traditional clay bricks.
Time saved.
25 Days
In 1000 sq.ft compared to traditional clay bricks per mason.
Money saved.
₹75,000
In 1000 sq.ft compared to traditional clay bricks.
Select the area (in sq.ft)
1000
1500
3000
9000
12,000
20,000
36,000
50,000
CO₂ saved.
5,500 kgs
In 1000 sq.ft compared to traditional clay bricks.
Time saved.
25 Days
In 1000 sq.ft compared to traditional clay bricks per mason.
Money saved.
₹75,000
In 1000 sq.ft compared to traditional clay bricks.
Imapct Calculator
Imapct Calculator
See the difference Agrocrete®
can make on your Project’s Footprint.
See the difference Agrocrete® can make on your Project’s Footprint.
350% Higher Thermal Insulation
50% Lower Construction Cost
100% Faster Masonry
1000 sq.ft
1500 sq.ft
3000 sq.ft
6000 sq.ft
9000 sq.ft
12,000 sq.ft
20,000 sq.ft
36,000 sq.ft
50,000 sq.ft
CO₂ captured.
4.4 tons
In 1000 sq.ft compared to traditional clay bricks.
Time saved.
25 days per mason
In 1000 sq.ft compared to traditional clay bricks.
Money saved.
₹1,25,000
In 1000 sq.ft compared to traditional clay bricks.
350% Higher Thermal Insulation
50% Lower Construction Cost
100% Faster Masonry
Select the area (in sq.ft)
1000
1500
3000
9000
12,000
20,000
36,000
50,000
CO₂ saved.
5,500 kgs
In 1000 sq.ft compared to traditional clay bricks.
Time saved.
25 Days
In 1000 sq.ft compared to traditional clay bricks per mason.
Money saved.
₹75,000
In 1000 sq.ft compared to traditional clay bricks.
Select the area (in sq.ft)
1000
1500
3000
9000
12,000
20,000
36,000
50,000
CO₂ saved.
5,500 kgs
In 1000 sq.ft compared to traditional clay bricks.
Time saved.
25 Days
In 1000 sq.ft compared to traditional clay bricks per mason.
Money saved.
₹75,000
In 1000 sq.ft compared to traditional clay bricks.
Here’s What People Say
Insights, stories, and ideas at the intersection of construction, climate, and community.

Jul 9, 2024
2 Min Read
2.1 tons
of CO2 Captured
Gudivada, Andhra Pradesh
Individual Residence, Gudivada, Andhra Pradesh
Tags:
COmpleted

Dec 23, 2022
2 Min Read
38.5 tons
of CO2 Captured
Kapurthala, Punjab
Perimeter Wall - 1.8 km, Kapurthala, Punjab
Tags:
COmpleted

Apr 28, 2023
1 Min Read
4 tons
of CO2 Captured
Vizianagaram, Andhra Pradesh
Mixed-Use Development, Vizianagaram, Andhra Pradesh
Tags:
COmpleted

Sep 2, 2025
1 Min Read
3 tons
of CO2 Captured
Rajahmundry, Andhra Pradesh
Individual Residence, Rajahmundry, Andhra Pradesh
Tags:
COmpleted

Feb 18, 2021
1 Min Read
3.1 tons
of CO2 Captured
Roorkee, Uttarakhand
Industrial Building, Roorkee, Uttarakhand
Tags:
COmpleted

Sep 24, 2025
1 Min Read
2.1 tons
of CO2 Captured
Chennai, Tamil Nadu
Services Building, Chennai, Tamil Nadu
Tags:
COmpleted
Notes from the Journey
Insights, stories, and ideas at the intersection of construction, climate, and community.
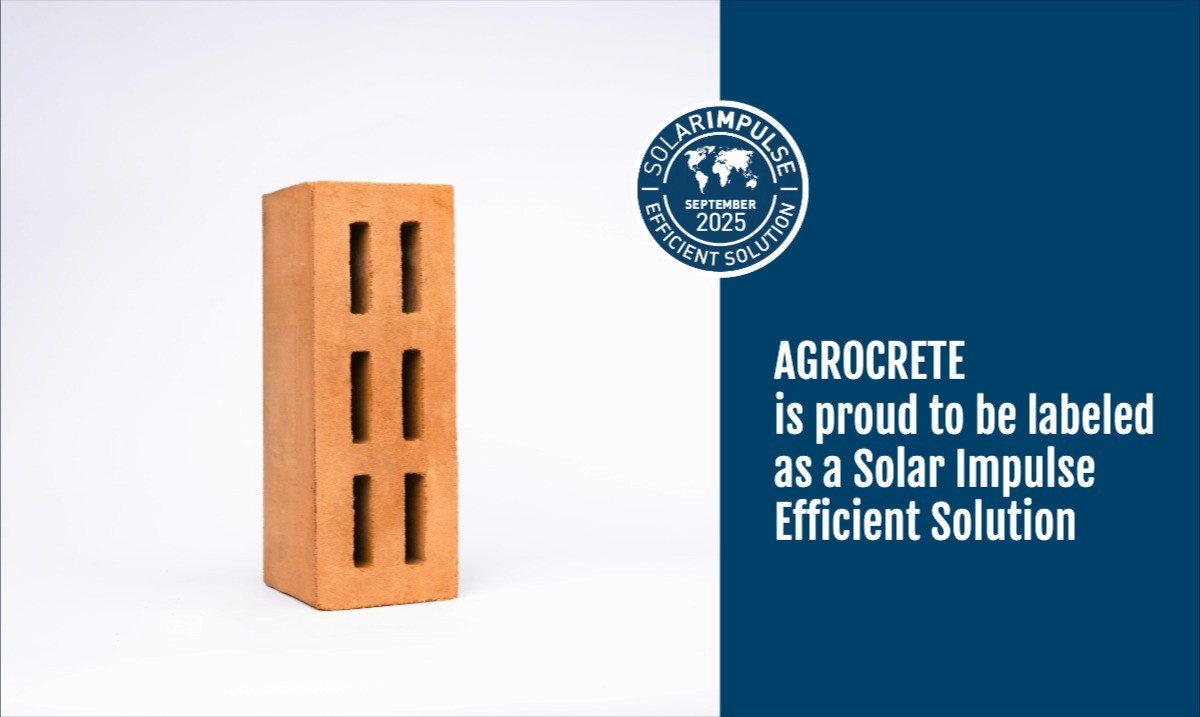
Jan 24, 2026
2 min
GreenJams’ Agrocrete® Becomes India’s Only Carbon-Negative Building Material to Earn the Prestigious Solar Impulse Efficient Solution Label
FOR IMMEDIATE RELEASE
Tags:
Press & Media

Dec 12, 2025
4 min
Heatwaves and Mivan Construction
‘Mivan Shuttering’ has been a godsend for the construction industry. That’s because Mivan technology enables extremely rapid construction, improves durability and earthquake resistance, and reduces wall thickness and increases carpet area in high rise buildings.
The Mivan construction technology essentially comprises a highly durable aluminium formwork fabricated in the shape and layout of the building including the walls, columns, beams, and slabs. It is extremely modular and uses the same formwork for all the floors of the building. The steel reinforcement is fixed within the formwork and concrete is poured into it to make the different members of the building.
Tags:
Technology

Dec 12, 2025
5 min
Agrocrete®: A weapon for the war against climate change
It was never an argument - climate change is real, and it demands urgent action. As per the IPCC 2018 Special Report on Global Warming of 1.5°C, it is estimated that by 2050, if the world isn’t fully carbon neutral, then global temperatures could increase by much more than 1.5C. However, as per Piers Froster, one of the lead authors of the landmark paper, there is still hope. He stated, “If the world can substantially reduce emissions in the 2020s and get to net zero carbon emissions by 2050, temperature rise can still be limited to 1.5C”.
This begs the question - how can we overturn climate change quickly and effectively? The surest way forward is geoengineering, which is essentially a way for human beings to manage the earth’s climate in deliberate ways. An effective, low cost way of geoengineering is to devise methods of Carbon Dioxide Removal, or CDR. Activities such as afforestation and reforestation are popular methods of CDR, however, given the time scale it takes to cause real impact, it isn’t a practical method despite its obvious benefits.
It is for this reason that more and more scientific and institutional efforts are directed towards creating ways of achieving CDR in a highly effective and relatively low-cost manner.
Tags:
product
Dec 12, 2025
3 min
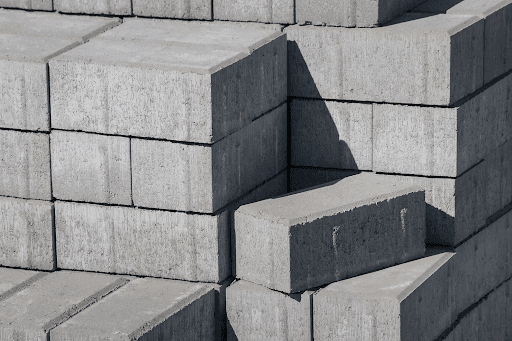
Are AAC blocks really green?
No, they're grey. Cheeky jokes apart, they aren't as "green" as they're purported to be. But why, and how?
Tags:
Sustainability
Dec 12, 2025
2 min
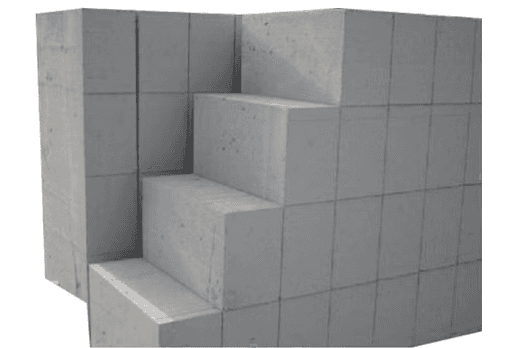
AAC Blocks: An accidental invention!
AAC Blocks (Autoclaved Aerated Concrete Blocks) are some of the most consumed building materials in the world. It currently offers one of the best value propositions in terms of cost of construction and technical performance. The manufacturing capacity in India is capable of producing approx. ₹15,000 crores worth blocks, annually. But the history of AAC blocks is fascinating – to begin with, it was an accidental invention!
Tags:
product

Dec 12, 2025
3 min
4 Principles of Cost Estimation
Cost estimation in project management is the process of forecasting the cost and other resources needed to complete a project within a defined scope. Cost estimation accounts for each element required for the project and calculates a total amount that determines a project's budget.
Tags:
Sustainability
Here’s What People Say
Insights, stories, and ideas at the intersection of construction, climate, and community.

Jul 9, 2024
2 Min Read
2.1 tons
of CO2 Captured
Gudivada, Andhra Pradesh
Individual Residence, Gudivada, Andhra Pradesh
Tags:
COmpleted

Dec 23, 2022
2 Min Read
38.5 tons
of CO2 Captured
Kapurthala, Punjab
Perimeter Wall - 1.8 km, Kapurthala, Punjab
Tags:
COmpleted

Apr 28, 2023
1 Min Read
4 tons
of CO2 Captured
Vizianagaram, Andhra Pradesh
Mixed-Use Development, Vizianagaram, Andhra Pradesh
Tags:
COmpleted

Sep 2, 2025
1 Min Read
3 tons
of CO2 Captured
Rajahmundry, Andhra Pradesh
Individual Residence, Rajahmundry, Andhra Pradesh
Tags:
COmpleted

Feb 18, 2021
1 Min Read
3.1 tons
of CO2 Captured
Roorkee, Uttarakhand
Industrial Building, Roorkee, Uttarakhand
Tags:
COmpleted

Sep 24, 2025
1 Min Read
2.1 tons
of CO2 Captured
Chennai, Tamil Nadu
Services Building, Chennai, Tamil Nadu
Tags:
COmpleted
Notes from the Journey
Insights, stories, and ideas at the intersection of construction, climate, and community.

Jan 24, 2026
2 min
FOR IMMEDIATE RELEASE
GreenJams’ Agrocrete® Becomes India’s Only Carbon-Negative Building Material to Earn the Prestigious Solar Impulse Efficient Solution Label
Tags:
Press & Media

Dec 12, 2025
4 min
‘Mivan Shuttering’ has been a godsend for the construction industry. That’s because Mivan technology enables extremely rapid construction, improves durability and earthquake resistance, and reduces wall thickness and increases carpet area in high rise buildings.
The Mivan construction technology essentially comprises a highly durable aluminium formwork fabricated in the shape and layout of the building including the walls, columns, beams, and slabs. It is extremely modular and uses the same formwork for all the floors of the building. The steel reinforcement is fixed within the formwork and concrete is poured into it to make the different members of the building.
Heatwaves and Mivan Construction
Tags:
Technology

Dec 12, 2025
5 min
It was never an argument - climate change is real, and it demands urgent action. As per the IPCC 2018 Special Report on Global Warming of 1.5°C, it is estimated that by 2050, if the world isn’t fully carbon neutral, then global temperatures could increase by much more than 1.5C. However, as per Piers Froster, one of the lead authors of the landmark paper, there is still hope. He stated, “If the world can substantially reduce emissions in the 2020s and get to net zero carbon emissions by 2050, temperature rise can still be limited to 1.5C”.
This begs the question - how can we overturn climate change quickly and effectively? The surest way forward is geoengineering, which is essentially a way for human beings to manage the earth’s climate in deliberate ways. An effective, low cost way of geoengineering is to devise methods of Carbon Dioxide Removal, or CDR. Activities such as afforestation and reforestation are popular methods of CDR, however, given the time scale it takes to cause real impact, it isn’t a practical method despite its obvious benefits.
It is for this reason that more and more scientific and institutional efforts are directed towards creating ways of achieving CDR in a highly effective and relatively low-cost manner.
Agrocrete®: A weapon for the war against climate change
Tags:
product

Dec 12, 2025
3 min
No, they're grey. Cheeky jokes apart, they aren't as "green" as they're purported to be. But why, and how?
Are AAC blocks really green?
Tags:
Sustainability

Dec 12, 2025
2 min
AAC Blocks (Autoclaved Aerated Concrete Blocks) are some of the most consumed building materials in the world. It currently offers one of the best value propositions in terms of cost of construction and technical performance. The manufacturing capacity in India is capable of producing approx. ₹15,000 crores worth blocks, annually. But the history of AAC blocks is fascinating – to begin with, it was an accidental invention!
AAC Blocks: An accidental invention!
Tags:
product

Dec 12, 2025
3 min
Cost estimation in project management is the process of forecasting the cost and other resources needed to complete a project within a defined scope. Cost estimation accounts for each element required for the project and calculates a total amount that determines a project's budget.
4 Principles of Cost Estimation
Tags:
Sustainability
Dec 12, 2025
6 min
Sustainable is defined as, “(the) avoidance of the depletion of natural resources in order to maintain an ecological balance” and gained traction as a concept only after the 1970s US oil crisis[1]. Though the reducing oil supply harboured a need to conserve oil and use it more efficiently, the focus of solutions were more on attaining ‘economic benefits’ for stakeholders instead of achieving an ‘ecological balance’. From the 1970s to now, the world has undergone a lot of industrial growth and the factors affecting the environment have continuously increased in number. With rising sea levels and deteriorating air quality world over, positive climate action is the need of the hour, but efforts towards sustainability still seems to be lost.
Misconstrued Sustainability
Tags:
Sustainability
Dec 12, 2025
8 min
[We write this short article as a tribute to Architect Revathi Kamath (1955 - 2020), the pioneer of mud architecture in India. We lack words to describe the loss of this stalwart who along with her late husband, Vasant Kamath, hosted our young founders with love and guided our innovations as gurus. Here’s a beautifully penned obituary on worldarchitecture.org which covers some of her works.]
Todays’ building materials and construction techniques have come a long way to suit industrialization, growing populations and market demand. However, materials and practices have, over time, become more synthetic, than sustainable, and directly emit about 40% of the global carbon emissions!
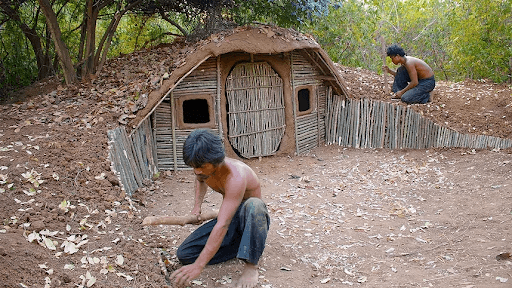
Whether it’s the lack of sleep, the YouTube algorithm or just curiosity, many of us have come across the videos featuring primitive construction in the wilderness with no modern tools or technology. While it overwhelms us with methods and end results, an interesting perspective from the lens of climate impact is often overlooked in such in content. ThisInternational Day of the World’s Indigenous Peoples, we cover some indigenous construction projects and practices from India to highlight material and process innovations that today's built environment could learn from.
Like our diverse history that has panned various centuries, our built heritage too has fragmented to different regions to best suit the geographical challenges. Using locally available materials and understanding various aspects like temperature variations, structural requirements, security concerns, ventilation, water harvesting and even natural calamities, many constructions have remained sustainable while withstanding the test of time. Here are some indigenous examples from around the country:
Indigenous Construction and Sustainability in India
Tags:
Sustainability
Here’s What People Say
Insights, stories, and ideas at the intersection of construction, climate, and community.

Jul 9, 2024
2 Min Read
2.1 tons
of CO2 Captured
Gudivada, Andhra Pradesh
Individual Residence, Gudivada, Andhra Pradesh
Tags:
COmpleted

Dec 23, 2022
2 Min Read
38.5 tons
of CO2 Captured
Kapurthala, Punjab
Perimeter Wall - 1.8 km, Kapurthala, Punjab
Tags:
COmpleted

Apr 28, 2023
1 Min Read
4 tons
of CO2 Captured
Vizianagaram, Andhra Pradesh
Mixed-Use Development, Vizianagaram, Andhra Pradesh
Tags:
COmpleted

Sep 2, 2025
1 Min Read
3 tons
of CO2 Captured
Rajahmundry, Andhra Pradesh
Individual Residence, Rajahmundry, Andhra Pradesh
Tags:
COmpleted

Feb 18, 2021
1 Min Read
3.1 tons
of CO2 Captured
Roorkee, Uttarakhand
Industrial Building, Roorkee, Uttarakhand
Tags:
COmpleted

Sep 24, 2025
1 Min Read
2.1 tons
of CO2 Captured
Chennai, Tamil Nadu
Services Building, Chennai, Tamil Nadu
Tags:
COmpleted
Notes from the Journey
Insights, stories, and ideas at the intersection of construction, climate, and community.

Jan 24, 2026
2 min
FOR IMMEDIATE RELEASE
GreenJams’ Agrocrete® Becomes India’s Only Carbon-Negative Building Material to Earn the Prestigious Solar Impulse Efficient Solution Label
Tags:
Sustainability
Featured

Dec 12, 2025
4 min
‘Mivan Shuttering’ has been a godsend for the construction industry. That’s because Mivan technology enables extremely rapid construction, improves durability and earthquake resistance, and reduces wall thickness and increases carpet area in high rise buildings.
The Mivan construction technology essentially comprises a highly durable aluminium formwork fabricated in the shape and layout of the building including the walls, columns, beams, and slabs. It is extremely modular and uses the same formwork for all the floors of the building. The steel reinforcement is fixed within the formwork and concrete is poured into it to make the different members of the building.
Heatwaves and Mivan Construction
Tags:
Sustainability
Featured

Dec 12, 2025
5 min
It was never an argument - climate change is real, and it demands urgent action. As per the IPCC 2018 Special Report on Global Warming of 1.5°C, it is estimated that by 2050, if the world isn’t fully carbon neutral, then global temperatures could increase by much more than 1.5C. However, as per Piers Froster, one of the lead authors of the landmark paper, there is still hope. He stated, “If the world can substantially reduce emissions in the 2020s and get to net zero carbon emissions by 2050, temperature rise can still be limited to 1.5C”.
This begs the question - how can we overturn climate change quickly and effectively? The surest way forward is geoengineering, which is essentially a way for human beings to manage the earth’s climate in deliberate ways. An effective, low cost way of geoengineering is to devise methods of Carbon Dioxide Removal, or CDR. Activities such as afforestation and reforestation are popular methods of CDR, however, given the time scale it takes to cause real impact, it isn’t a practical method despite its obvious benefits.
It is for this reason that more and more scientific and institutional efforts are directed towards creating ways of achieving CDR in a highly effective and relatively low-cost manner.
Agrocrete®: A weapon for the war against climate change
Tags:
Sustainability
Featured

Dec 12, 2025
3 min
No, they're grey. Cheeky jokes apart, they aren't as "green" as they're purported to be. But why, and how?
Are AAC blocks really green?
Tags:
Sustainability
Featured

Dec 12, 2025
2 min
AAC Blocks (Autoclaved Aerated Concrete Blocks) are some of the most consumed building materials in the world. It currently offers one of the best value propositions in terms of cost of construction and technical performance. The manufacturing capacity in India is capable of producing approx. ₹15,000 crores worth blocks, annually. But the history of AAC blocks is fascinating – to begin with, it was an accidental invention!
AAC Blocks: An accidental invention!
Tags:
Sustainability
Featured

Dec 12, 2025
3 min
Cost estimation in project management is the process of forecasting the cost and other resources needed to complete a project within a defined scope. Cost estimation accounts for each element required for the project and calculates a total amount that determines a project's budget.
4 Principles of Cost Estimation
Tags:
Sustainability
Featured

Dec 12, 2025
6 min
Sustainable is defined as, “(the) avoidance of the depletion of natural resources in order to maintain an ecological balance” and gained traction as a concept only after the 1970s US oil crisis[1]. Though the reducing oil supply harboured a need to conserve oil and use it more efficiently, the focus of solutions were more on attaining ‘economic benefits’ for stakeholders instead of achieving an ‘ecological balance’. From the 1970s to now, the world has undergone a lot of industrial growth and the factors affecting the environment have continuously increased in number. With rising sea levels and deteriorating air quality world over, positive climate action is the need of the hour, but efforts towards sustainability still seems to be lost.
Misconstrued Sustainability
Tags:
Sustainability
Featured

Dec 12, 2025
8 min
[We write this short article as a tribute to Architect Revathi Kamath (1955 - 2020), the pioneer of mud architecture in India. We lack words to describe the loss of this stalwart who along with her late husband, Vasant Kamath, hosted our young founders with love and guided our innovations as gurus. Here’s a beautifully penned obituary on worldarchitecture.org which covers some of her works.]
Todays’ building materials and construction techniques have come a long way to suit industrialization, growing populations and market demand. However, materials and practices have, over time, become more synthetic, than sustainable, and directly emit about 40% of the global carbon emissions!
Whether it’s the lack of sleep, the YouTube algorithm or just curiosity, many of us have come across the videos featuring primitive construction in the wilderness with no modern tools or technology. While it overwhelms us with methods and end results, an interesting perspective from the lens of climate impact is often overlooked in such in content. ThisInternational Day of the World’s Indigenous Peoples, we cover some indigenous construction projects and practices from India to highlight material and process innovations that today's built environment could learn from.
Like our diverse history that has panned various centuries, our built heritage too has fragmented to different regions to best suit the geographical challenges. Using locally available materials and understanding various aspects like temperature variations, structural requirements, security concerns, ventilation, water harvesting and even natural calamities, many constructions have remained sustainable while withstanding the test of time. Here are some indigenous examples from around the country:
Indigenous Construction and Sustainability in India
Tags:
Sustainability
Featured
Frequently asked questions
Have Questions?
We’ve Got Answers.
What is Agrocrete®?
Agrocrete® is a carbon-negative building block made from upcycled crop residues and industrial by-products. It’s stronger, lighter, cooler, and more durable than conventional bricks, while also reducing environmental impact.
What does ‘carbon-negative’ mean?
How is Agrocrete® better than regular bricks?
Is Agrocrete® certified?
Where can it be used?
Is it termite-resistant and fire-resistant?
Will it change my construction process?
What’s its environmental impact?
Turning Buildings into Carbon Sinks.
Whether you're building a home, a highway, or a housing board, Agrocrete® empowers you to build better for the planet — and your bottom line.
Downloads
Spec Sheet
Certificates
Comparisons
Contact Us
Presence : Visakhapatnam, Bengaluru, Mysore.
Turning Buildings into Carbon Sinks.
Whether you're building a home, a highway, or a housing board, Agrocrete® empowers you to build better for the planet — and your bottom line.
Downloads
Spec Sheet
Certificates
Contact Us
Presence : Visakhapatnam, Bengaluru, Mysore.
Turning Buildings into Carbon Sinks.
Whether you're building a home, a highway, or a housing board, Agrocrete® empowers you to build better for the planet — and your bottom line.
Downloads
Spec Sheet
Certificates
Comparisons
Contact Us
Presence : Visakhapatnam, Bengaluru, Mysore.


